Note: The PhotoSpring for Mac application is being phased out in favor of our Web based uploader. As of Aug 2021 it still works on MacOs 11. Any issues with the app will not be supported or fixed. We feel like the improvements we have made to the Web browser upload times makes it a viable alternative to send thousands of photos to the frame.
This guide will take you through:
- Downloading PhotoSpring for Mac from the Mac Store
- Installing PhotoSpring for Mac on your computer
- Configuring it
Before you start you will need to have an existing PhotoSpring account. You can sign up for an account at my.photospring.com.
Step 1: Download PhotoSpring for Mac from the Mac App Store
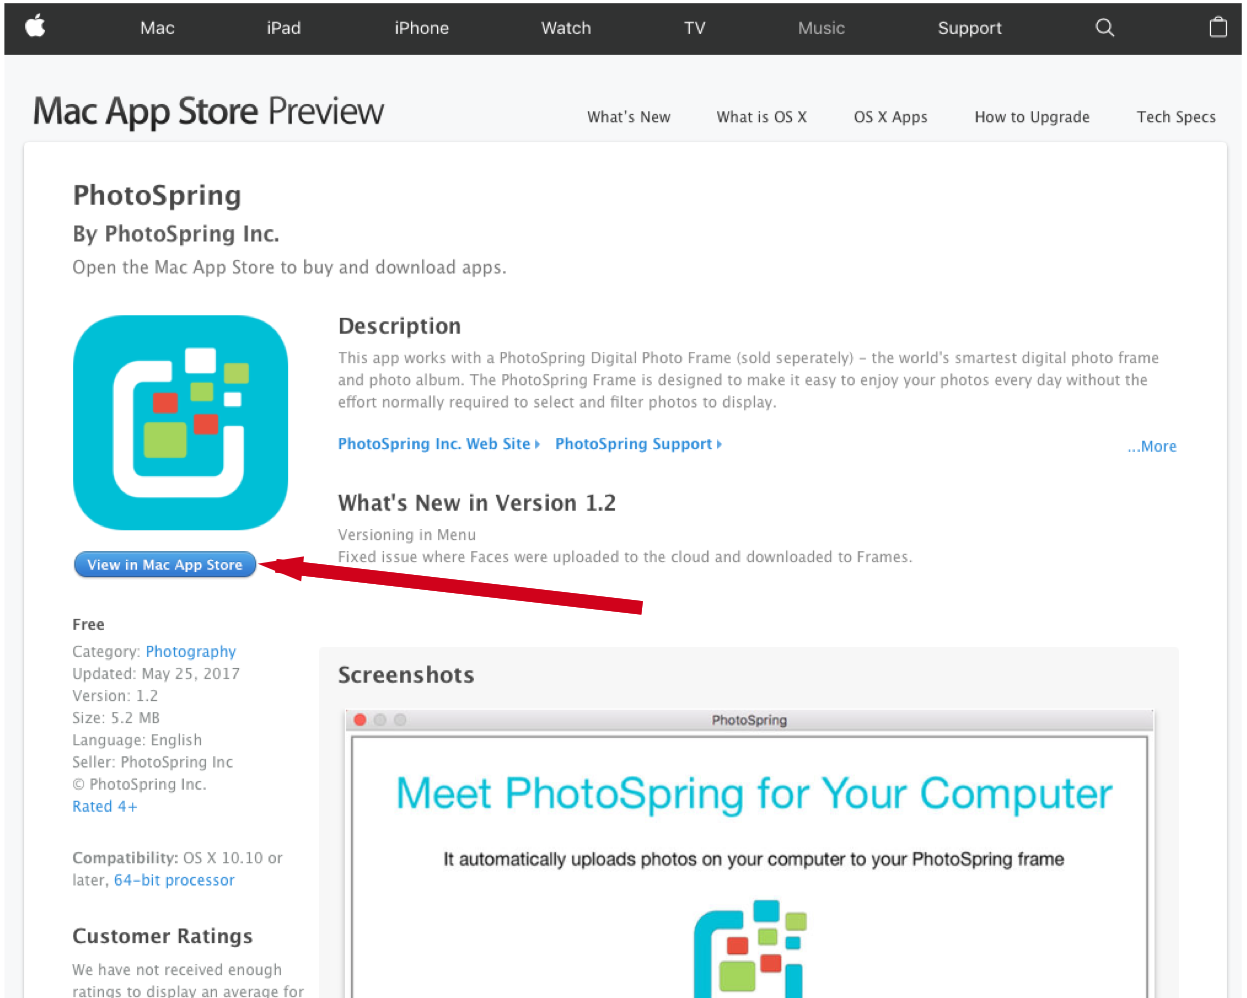
Click this link to go to the Mac App Store preview page. Click on the View in Mac App Store button as indicated by the arrow below:
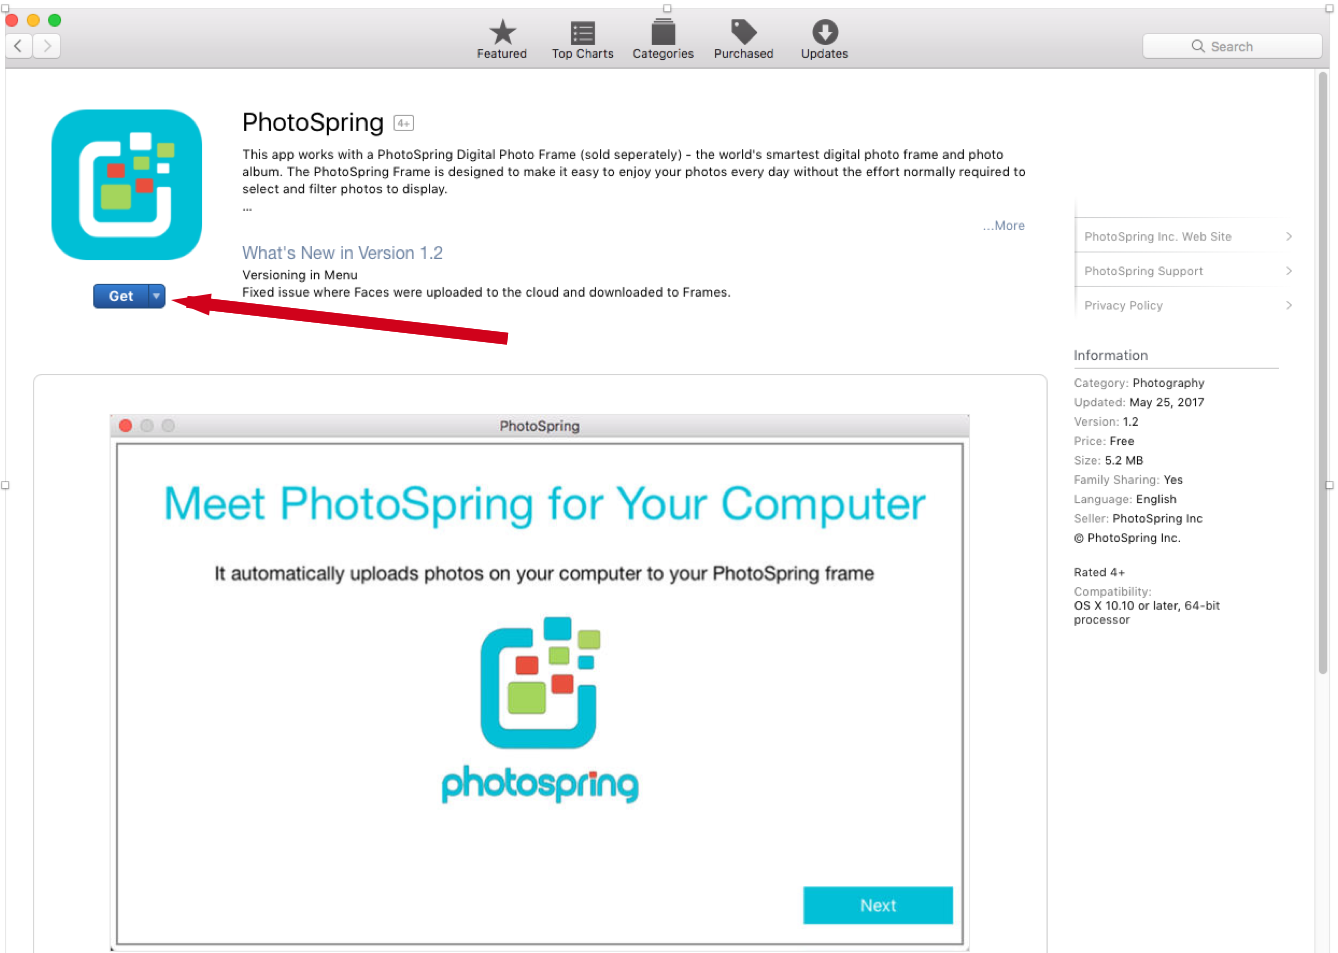
Clicking on the button indicated above will open a your Mac App Store. You'll see a screen like this below. Click on the Get button as shown by the red arrow below. Note, if you already have PhotoSpring installed you will see a blue Open button instead which you can click to open PhotoSpring.
Step 2: Install PhotoSpring for Mac
Clicking on the Get button will turn it into this green Install button:

Click the Install button. This will download and install PhotoSpring on your Mac. When installation if completed, the Install button will change to the Open button.

Click on the Open button to launch PhotoSpring for Mac.
Step 3: Configure PhotoSpring for Mac
When you open the PhotoSpring app for Mac, two things will happen.
First, PhotoSpring will be installed and appear in the Menu Status portion of the Menu Bar You can see the Menu Bar at the top of your computer monitor, with the Menu Status on the right side. It will look something like this:

In the future you can access the PhotoSpring App for Mac from here whenever you need to make changes.
The Second thing you will see is the PhotoSpring App for Mac start page. Click on Next as seen below:

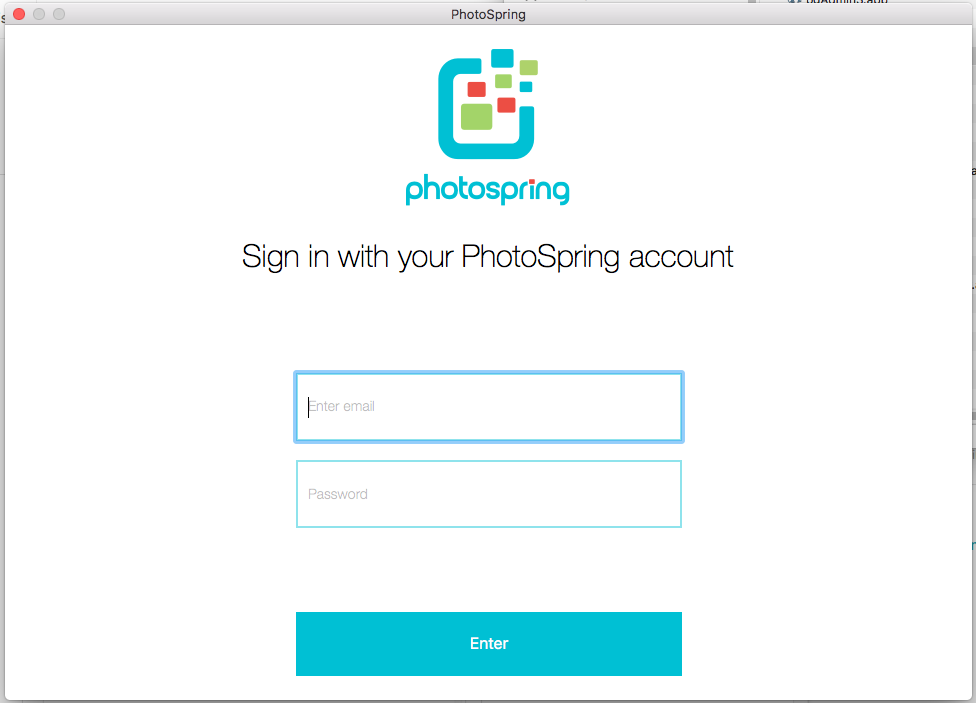
Login
|
Log into the App by using the email and password you previously entered to create a PhotoSpring account, then click Enter. Note: If you can't remember your password please go to https://my.photospring.com/users on your browser and click on I forgot my password to retrieve your password.
|
 |
Select a Frame
In the next screen select a frame and click next. Most likely you have one frame. So select it and click next.

Choose an Upload Method
Important: Read below carefully
Decide which of the following best describes your situation and follow directions.
- If all your photos are in Mac Photos, then skip to Mac Photos Upload Configuration section near the end of this document below. Most people fall into this category. So if you don't know, assume this applies to you.
- If you store photos in folder directories then continue below. Most people do not fall into this category.
Folder Based Upload Configuration
This configuration is useful only for people who manually manage photos and videos using folders. Configuring Folder Based uploads is a powerful way to automatically upload photos to your PhotoSpring frame.
Note: If you use Mac Photos, this probably isn't for you, unless you want to push ALL your photos on your Mac to your PhotoSprig frame. Otherwise, you probably want to skip to Mac Photos Upload Configuration section near the end of this document below.
The following steps will allow you to specify a set of folders to grab photos from. The PhotoSpring app can push photos the PhotoSpring frame of your choice (as long as you are the owner of the frame) in the following ways:
- Existing Photos: Photos currently in the designated folders you choose will be automatically pushed to the frame.
- New Photos: Any photos you add to the folders in the future will be automatically pushed to the frame.
- No Videos: Since videos are so large, we do not automatically push videos to the frame. You need to push videos manually, using either the Web interface or through the Mac Photos App.
Select an Upload Folder
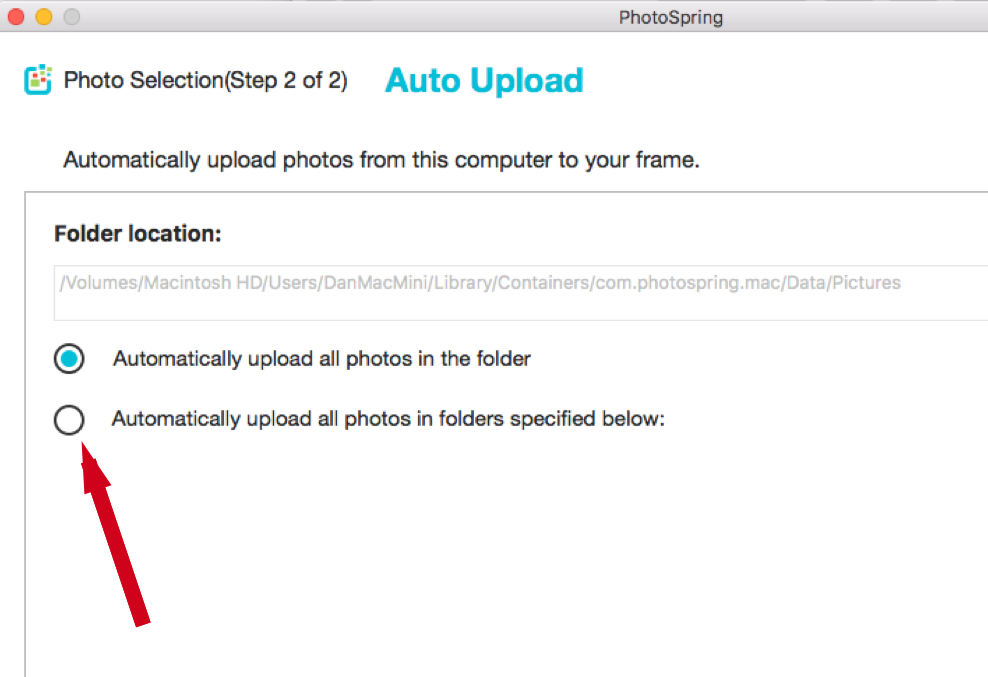
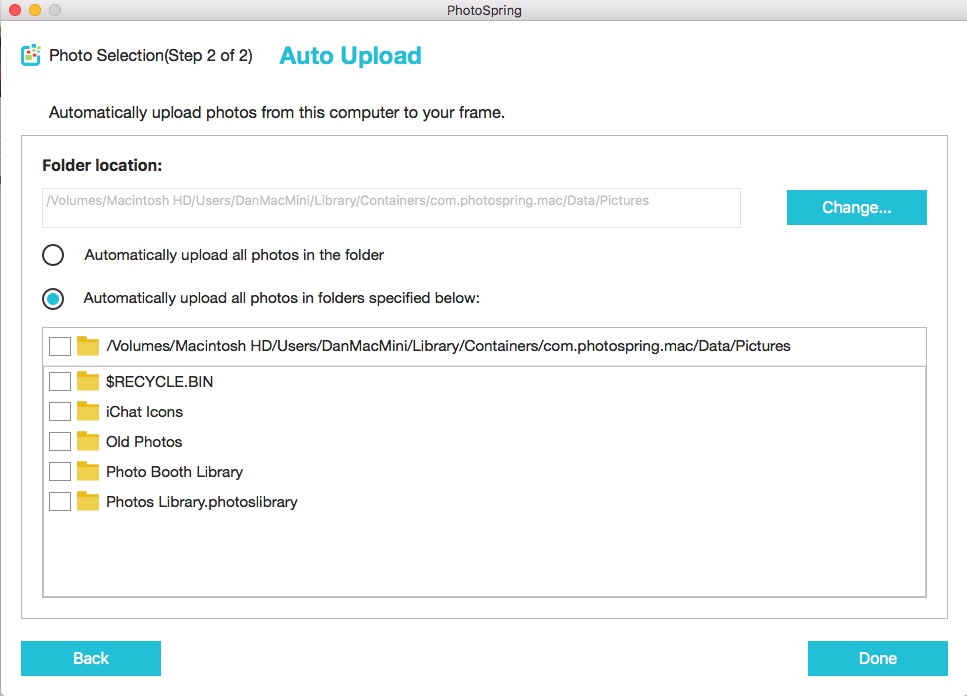
You should now see the Auto Upload screen, which looks like this:
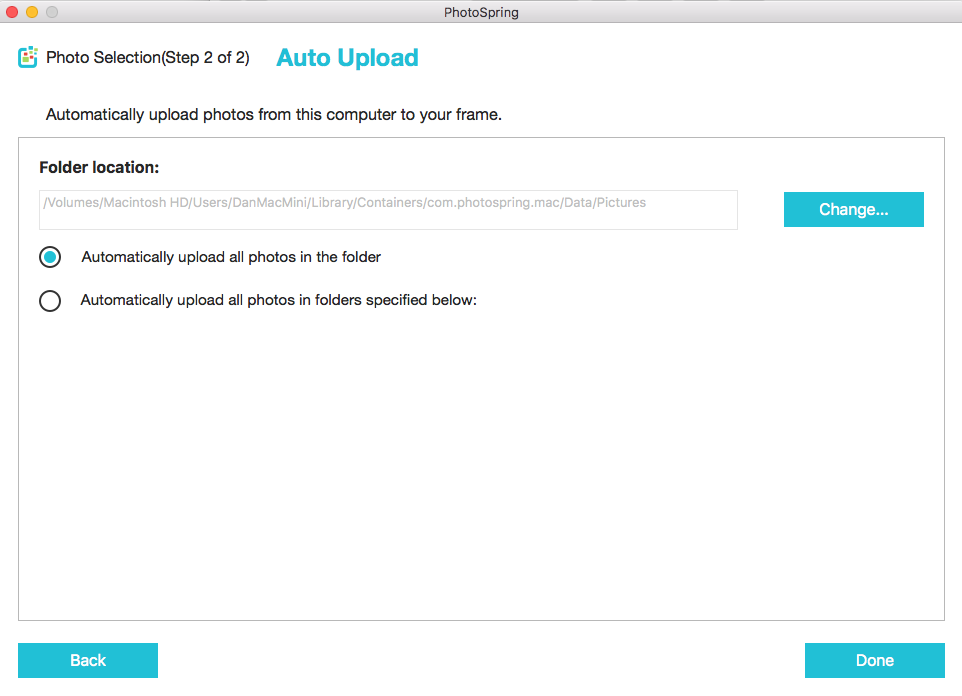
You can change the root folder by clicking on Change.
You can select how photos are uploaded from the root folder:
- Automatically upload all photos in the folder will upload ALL photos in the root folder.
- Automatically upload all photos in the folders specified below will allow you to control which subfolders to load. We recommend using this setting, steps which are detailed below:
On the Auto Upload screen, select Automatically upload all photos in the folders specified below.
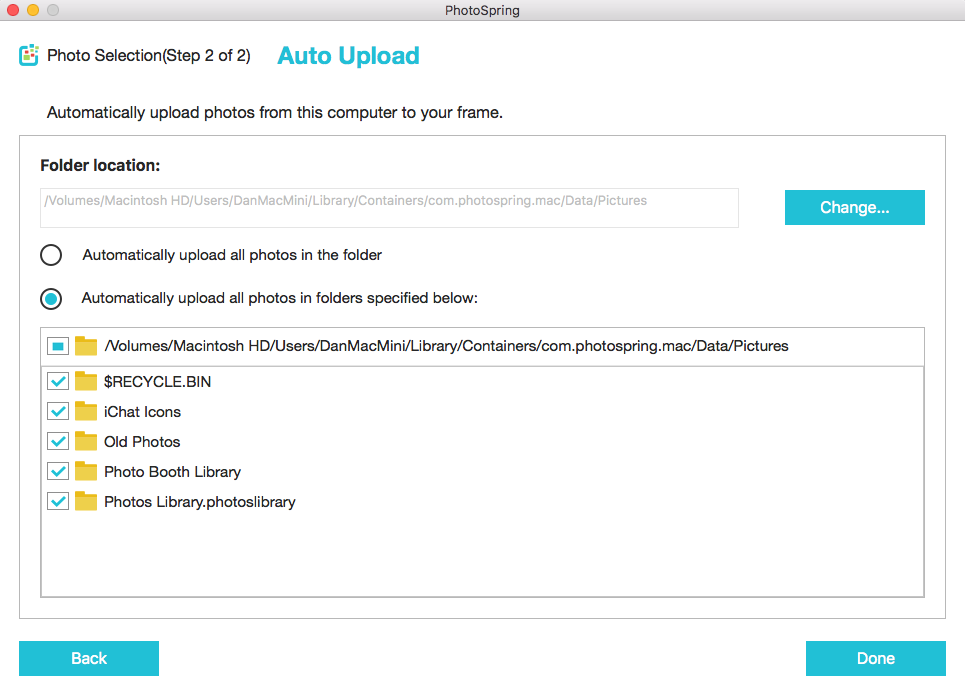
The next screen will look like this. Check any box where you want photos to be automatically pushed from.
- A checked box means the contents of that folder and any sub folders will be automatically uploaded to PhotoSpring
- An unchecked box means that the contents of that folder and any sub folders will NOT be automatically uploaded to PhotoSpring
If you uncheck the box next to the root folder as shown below. It will uncheck all the boxes below it. Then you can proactively select which subfolders you want to pull photos from.
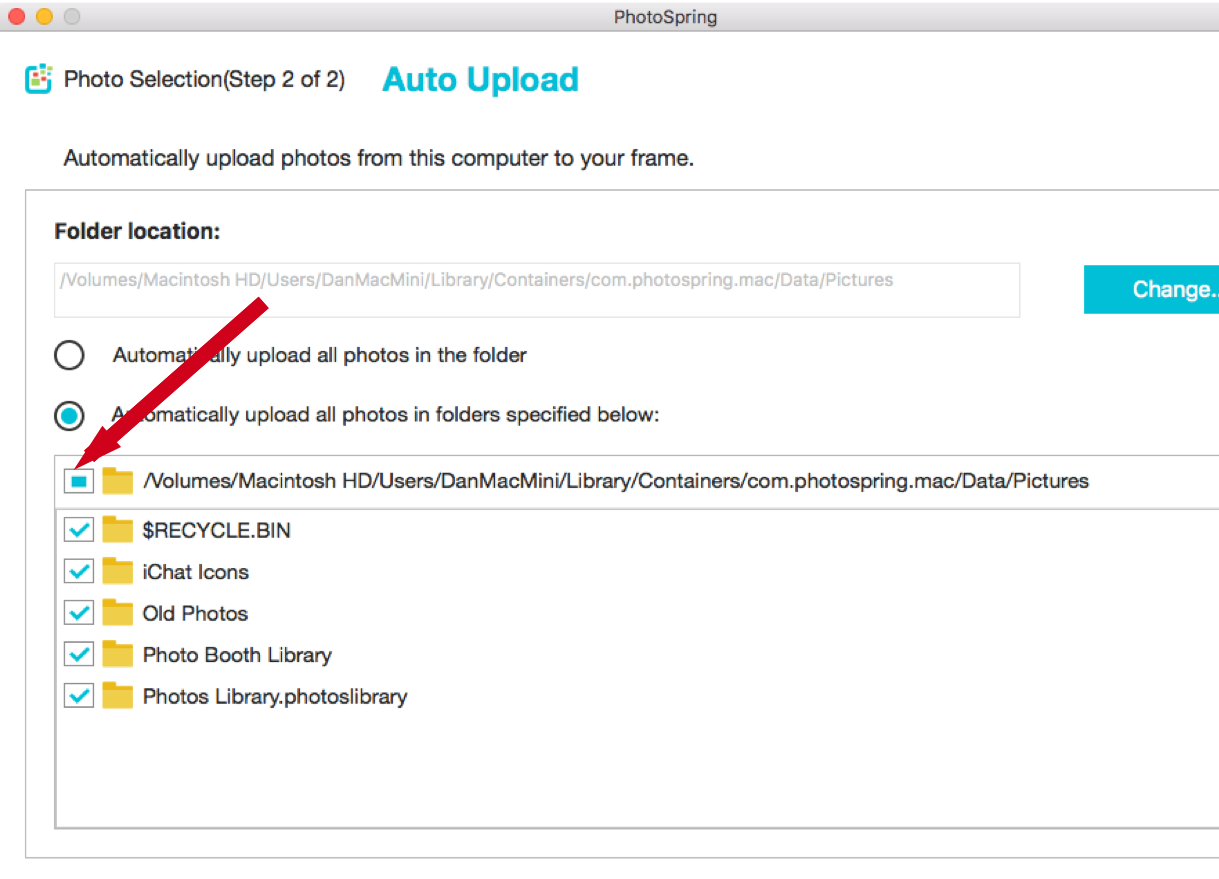
Once you've selected the photos you want to push to PhotoSpring click on Done in the lower right corner of the screen.
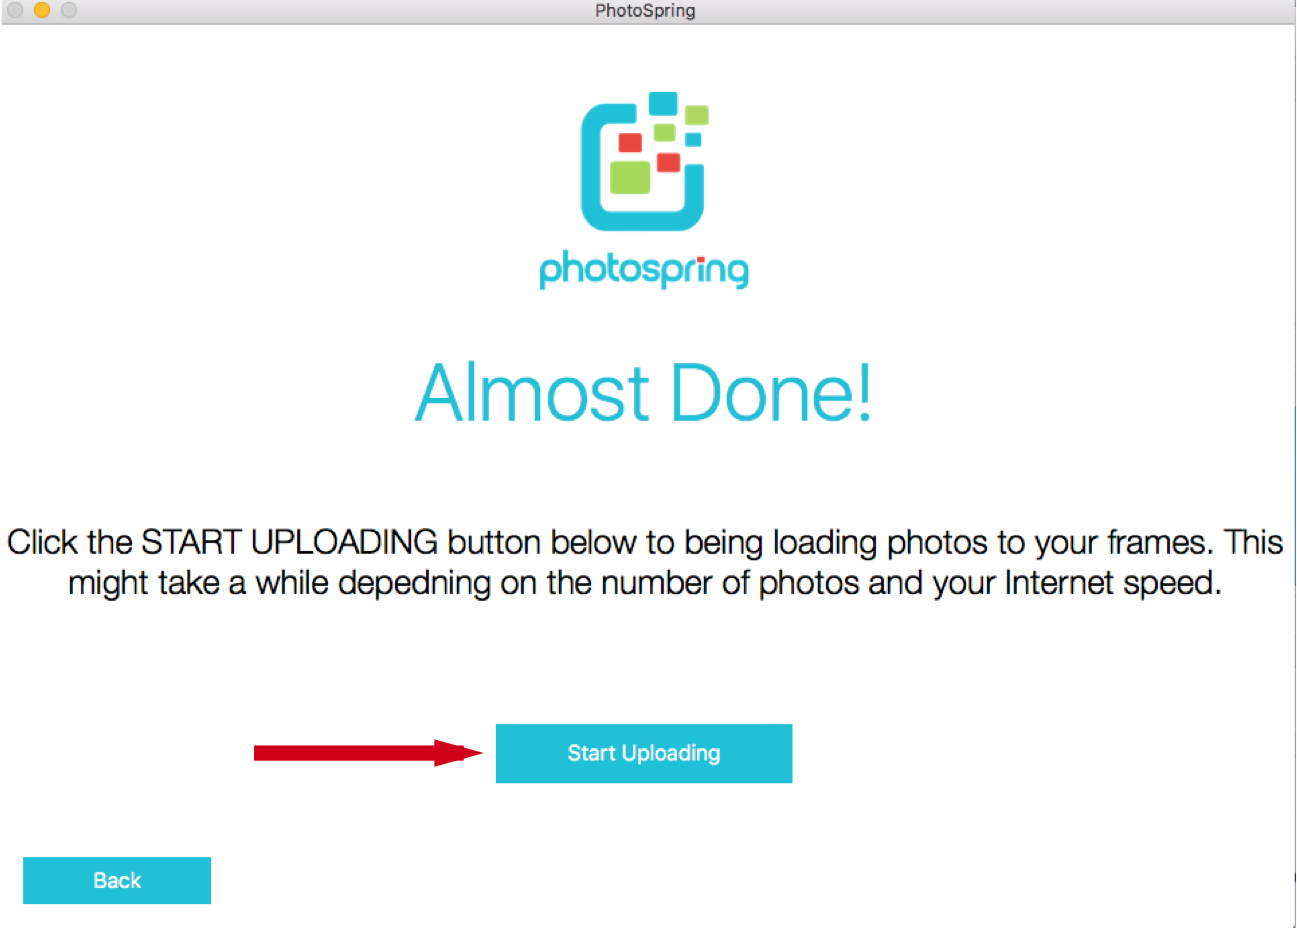
The next screen will complete the process. Click on the Start Uploading button in the middle of the screen.
| To access the app in the future: Just go Menu Bar at the upper right portion of your Mac and click on the PhotoSpring icon. A menu like this should appear. Click on Settings to go back to the settings screens. You can also pause uploads by clicking Turn Auto Upload Off. |  |
To learn more about what PhotoSpring for Mac can do please skip below to the section titled: Other things you can do with the PhotoSpring app in red.
Mac Photos Upload Configuration
These configuration steps are only for people who use Mac Photos (Or Aperture) to manage photos.
If you want to manually select photos from Mac Photos (or Aperture) to send to the frame you can close PhotoSpring for Mac (red dot on the upper left corner of the screen) and exit out. Then following the instructions in this link. Most people fall into this category.
If you want to send ALL your photos in Mac Photos to your frame, then continue reading.
| NOTE: For most people, the following steps are not recommended. The steps outlined below will upload ALL photos from you Mac Photos library to your frame. For most people we recommend manually selecting photos from Mac Photos. Please read the bolded test two paragraphs above to get the link for instructions on sending photos manually from Mac Photos. |
You should now see the Auto Upload screen, which looks like this:
On the Auto Upload screen, select Automatically upload all photos in the folders specified below.
Uncheck the box next to the root folder as shown below. It will uncheck all the boxes below it.
You should now see a screen similar to the one below. No boxes should be checked. This means we will not be auto uploading anything to our frame. Click Done.
Click on the Start Uploading button when you see the screen below. Again, nothing to upload.
If you keep all your photos in Mac Photos then you're now done configuring PhotoSpring for Mac. You probably want to click here to learn how to send photos from Mac Photos to your frame.
|
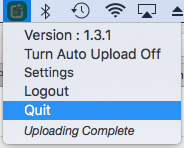
Optional: You can turn the PhotoSpring Mac app off. It will still work with the Mac Photos App. Just go into the Menu Bar at the top right of your Mac screen and click on the PhotoSpring icon. A menu like this should appear. Click on Quit and the app icon will disappear from the top tray. |
 |
Other things you can do with the PhotoSpring app
Find the PhotoSpring App in the Status Menu of the Menu Bar
After installing PhotoSpring for Mac, you can right click the PhotoSpring icon in the Menu Bar at the top of the screen. Here's a typical Mac screen with the PhotoSpring logo on the left side.

If you don't see this logo, but have previously installed PhotoSpring, please look in your Applications folder for the PhotoSpring app and double click on it to open it. Then you will see the icon described above in the Menu Bar.
Click on the PhotoSpring App in the Menu Bar to reveal the menu

Here are the details on each menu item:
| Version | This tells you the version number of the PhotoSpring app |
|
Turn Auto Upload On/Off |
This turns Auto Upload on or off. You will see a change in the app status after you do this. See Status below. |
| Settings | Click on settings to go back and reconfigure what frame to send to or what folder to target. |
| Logout | Logout of the PhotoSpring App for Mac. This allows you to log into a different account. |
| Quit | Quit the PhotoSpring App for Mac. When you reopen the app it will open up without requiring login. |
|
Status
|
The PhotoSpring app has the following states:
|
To stay up to date on PhotoSpring's latest features, news and discounts please follow us on Twitter or Facebook.