First Get to the Date and Time Settings Screen
To change the date or time first get into the Date and Time editing screen if you haven't already done so. To do this, first locate the time located in the lower right corner of the Photo Info and Settings screens. See below. The red arrow points to where the time usually is.
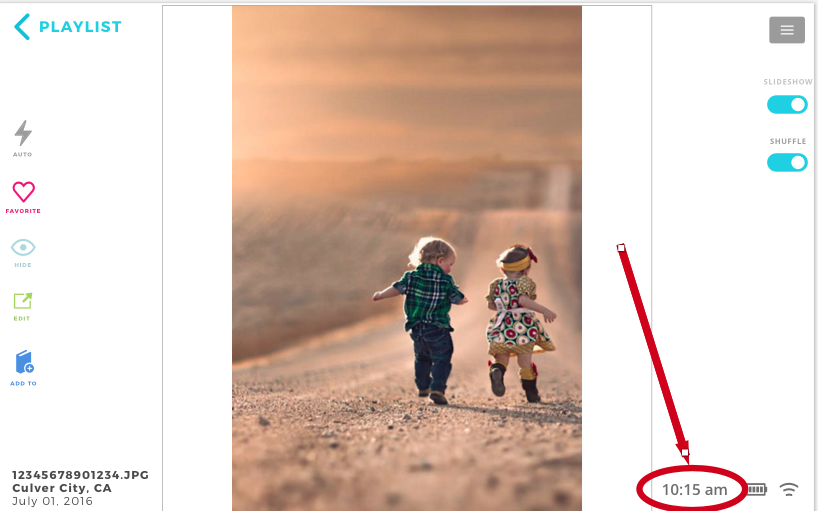
Tapping on the time will open up the Date and Time settings screen.
If the Date or Time is Wrong
If the date or time you see on the frame are wrong it may cause issues with downloading photos and other things.
To adjust the date/time, first turn off the Automatic time setting as shown below.
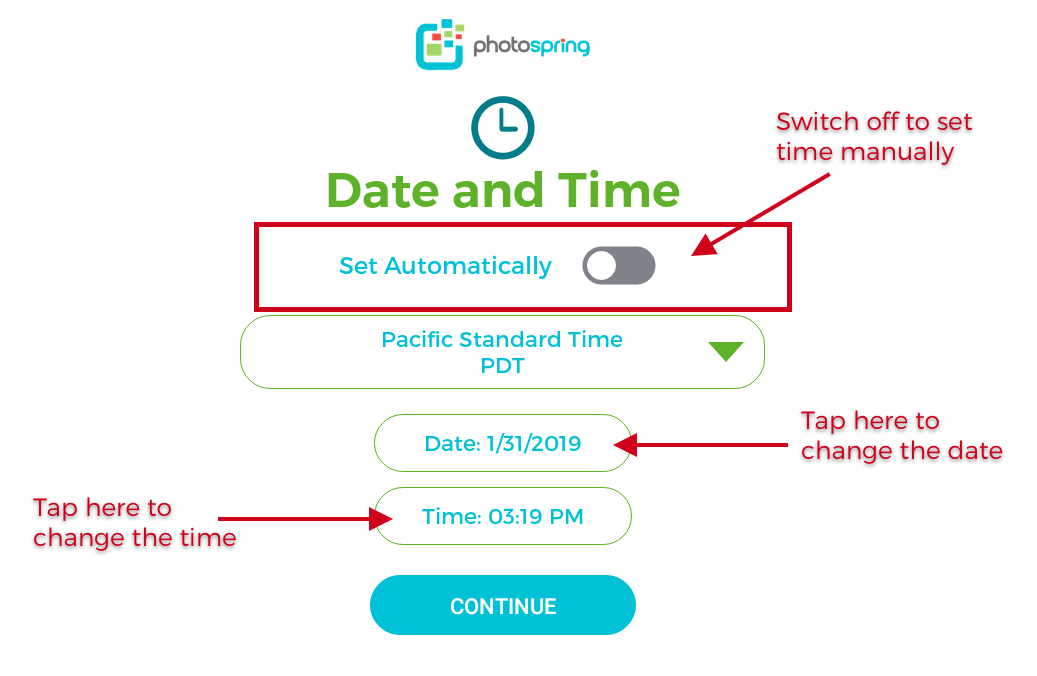
- To adjust the date - please tap the date.
- Adjusting the Year - tap the year and scroll up and down to adjust it
- Adjusting the Date - scroll and down on the calendar to adjust it
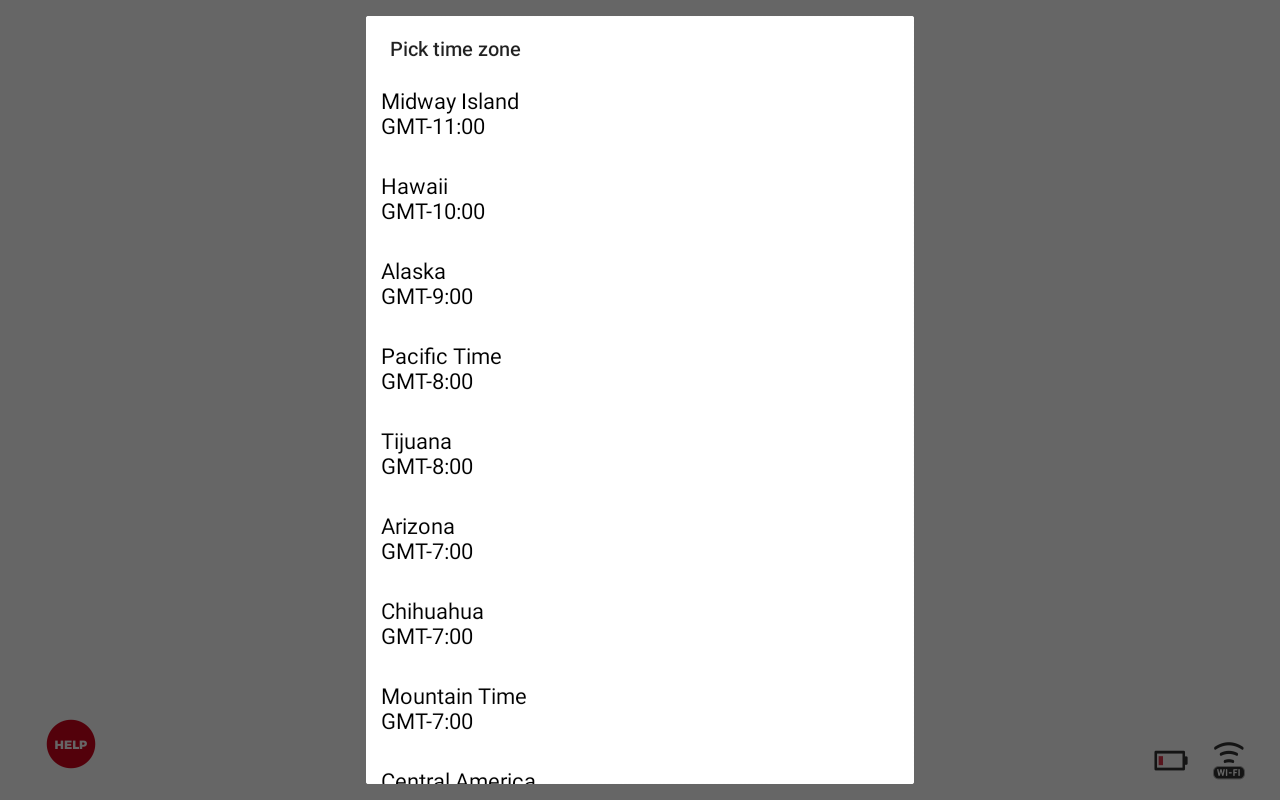
- Adjust the time zone - tap the time zone and scroll up and down to find your time zone.
- To adjust the time - please tap the time
- Tap the correct hour
- Then tap the correct minutes
- Then adjust for AM or PM by tapping on the AM/PM buttons
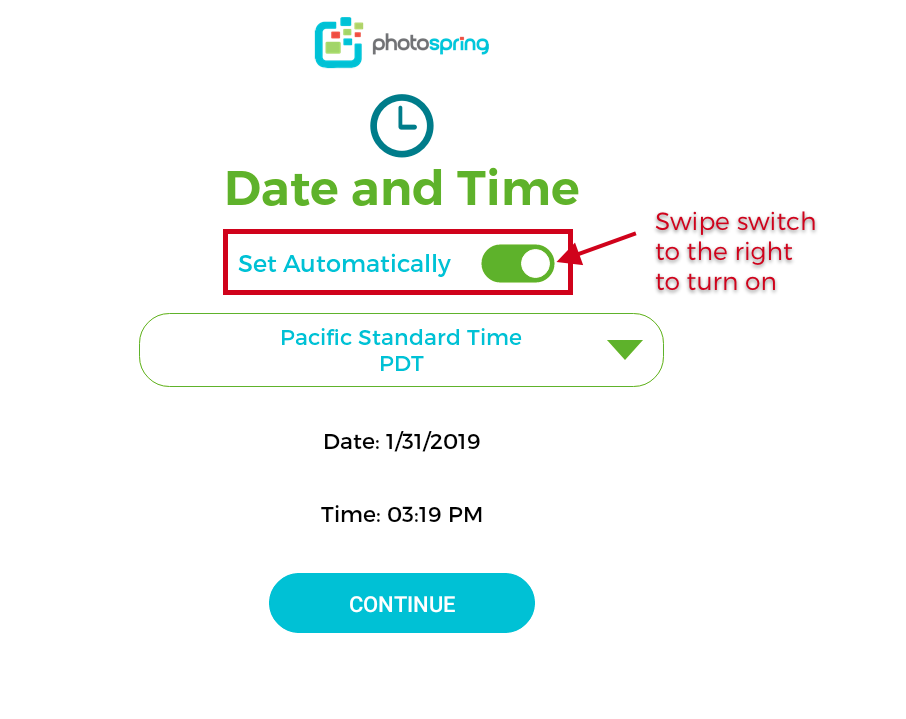
Once the time is adjusted we recommend setting the Set Automatically switch to On.
Set Time Automatically
PhotoSpring can automatically set the time for you by using your location to determine what time zone you should be in. To allow PhotoSpring to automatically set the time, turn the Set Automatically switch to ON.
After turning Set Automatically to ON you may need to select the correct time zone. Tap on the timezone button to reveal a list of time zones.
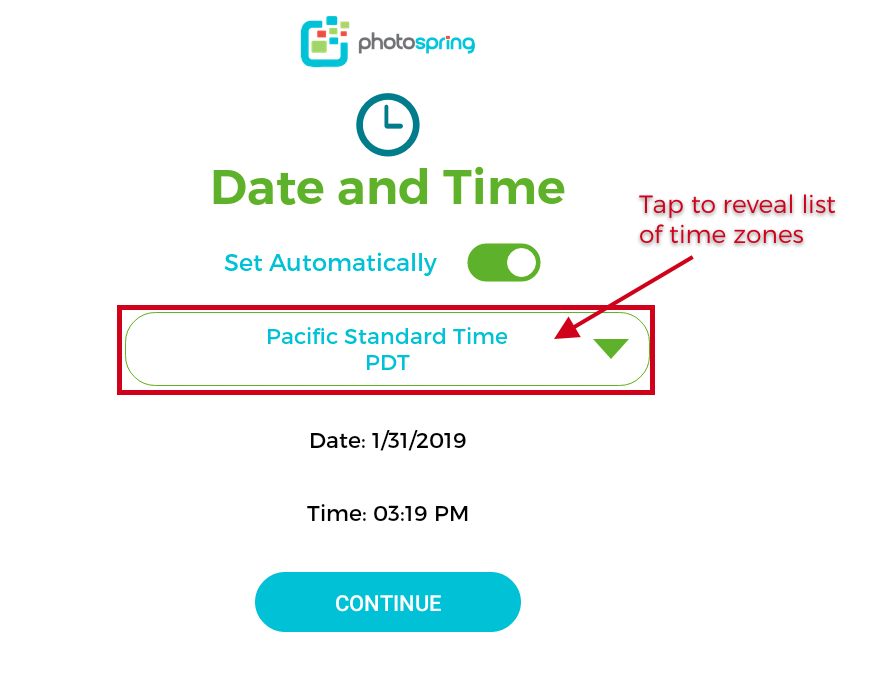
Tap the time zone from the list to select it. You may need to scroll up and down the list to find your timezone:
Once you've select your time zone you can exit the Date/Time settings screen. PhotoSpring is now set up to automatically get the time from the network.
Set Time Manually
Sometimes you want the frame to just use its internal clock and not sync with the time from the Internet. To set time manually you turn Set Automatically off. When you do this you will see that the date and time are replaced by two buttons.
Setting the Time
Tap on the Time button as shown above to go to the time settings screen. You can then then
1. Set the hour by tapping on the hour hand (see below)
2. Set the min by tapping on the min hand (this is done after setting the hour)
3. Set for morning or afternoon by tapping on AM or PM (see below)
Note: Please make sure you set AM/PM. In our testing, this is something we always tended to get wrong.
Setting the Date
To set the date, tap the Date: button seen above in the Setting Time Manually Section to make the date selection popup to appear.
Select the year by tapping on the year and scrolling up and down through the years - tap to select.
Select the month/date by scrolling through the months and tapping on the correct date.
Note: make sure to set the correct date. If the date is wrong its possible that the frame will not be able to download photos.
Tags: Change time, set time, adjust time, change date, set date, adjust date.